

A couple of bespoke playlists for when the mood takes you!
Setup
Place and power the DDJ-FLX4
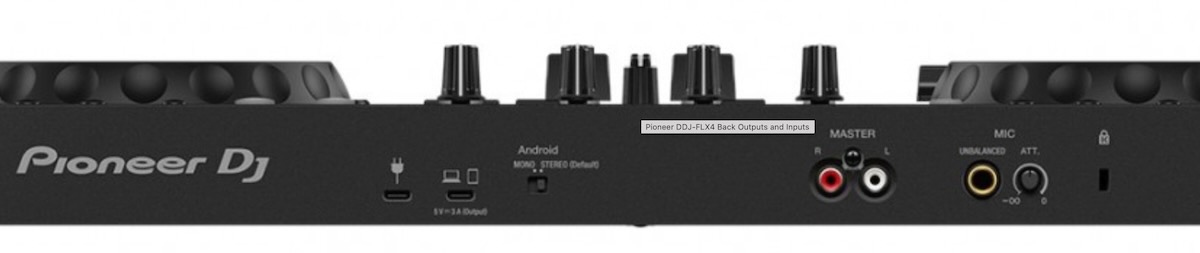
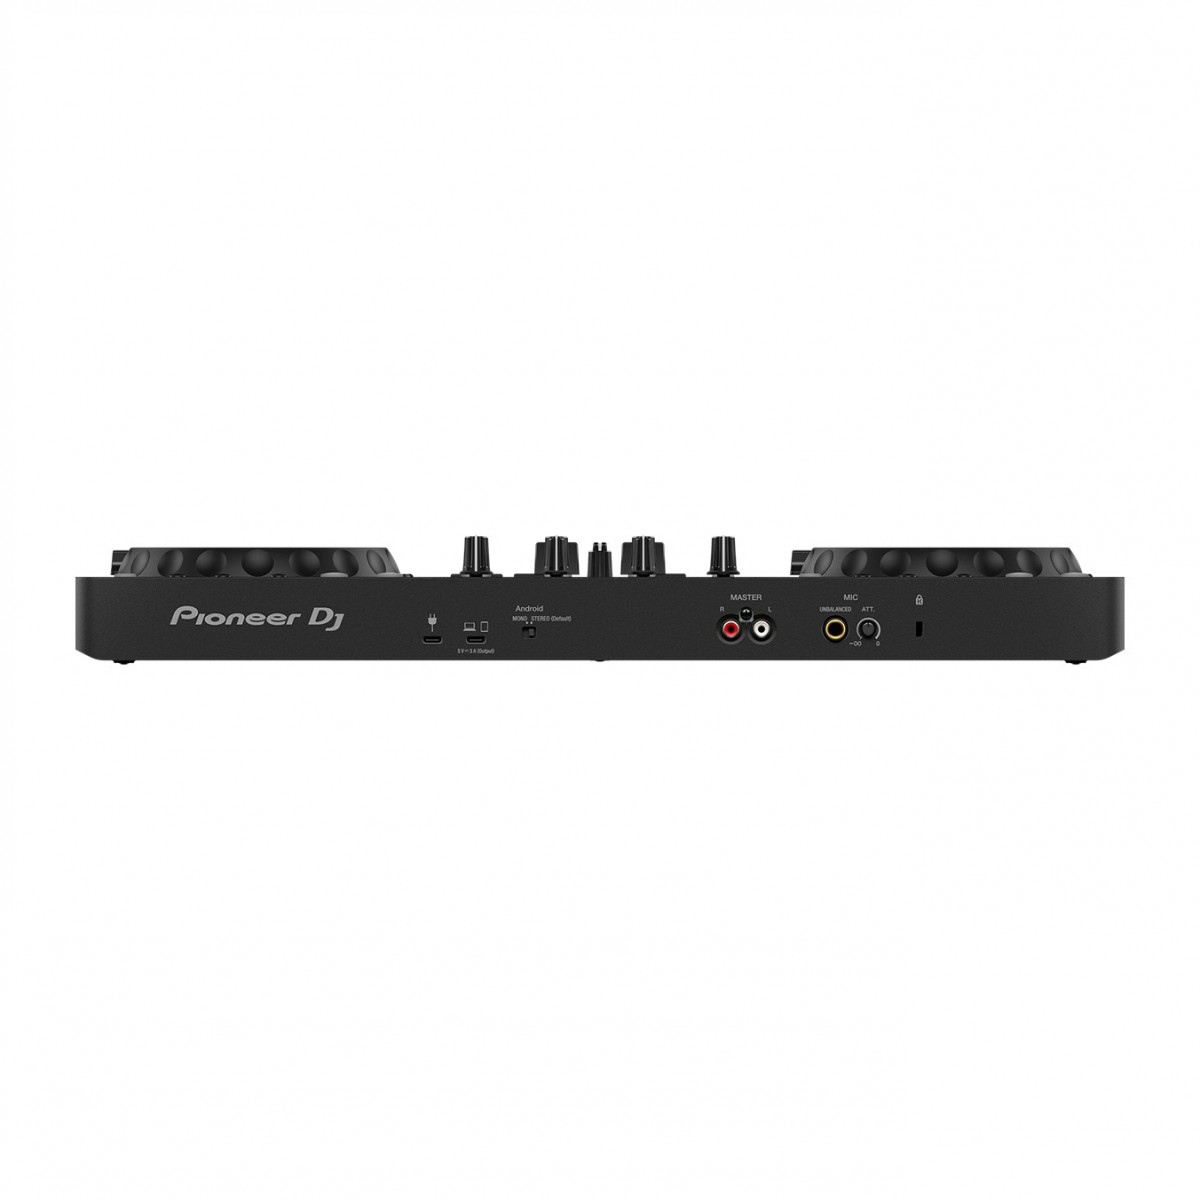
Place the controller on your surface. Plug the Anker 65W charger into mains, then run a USB-C cable from the charger into the power input port on the far left of the FLX4 rear panel. This leaves two spare ports on the charger for device charging.
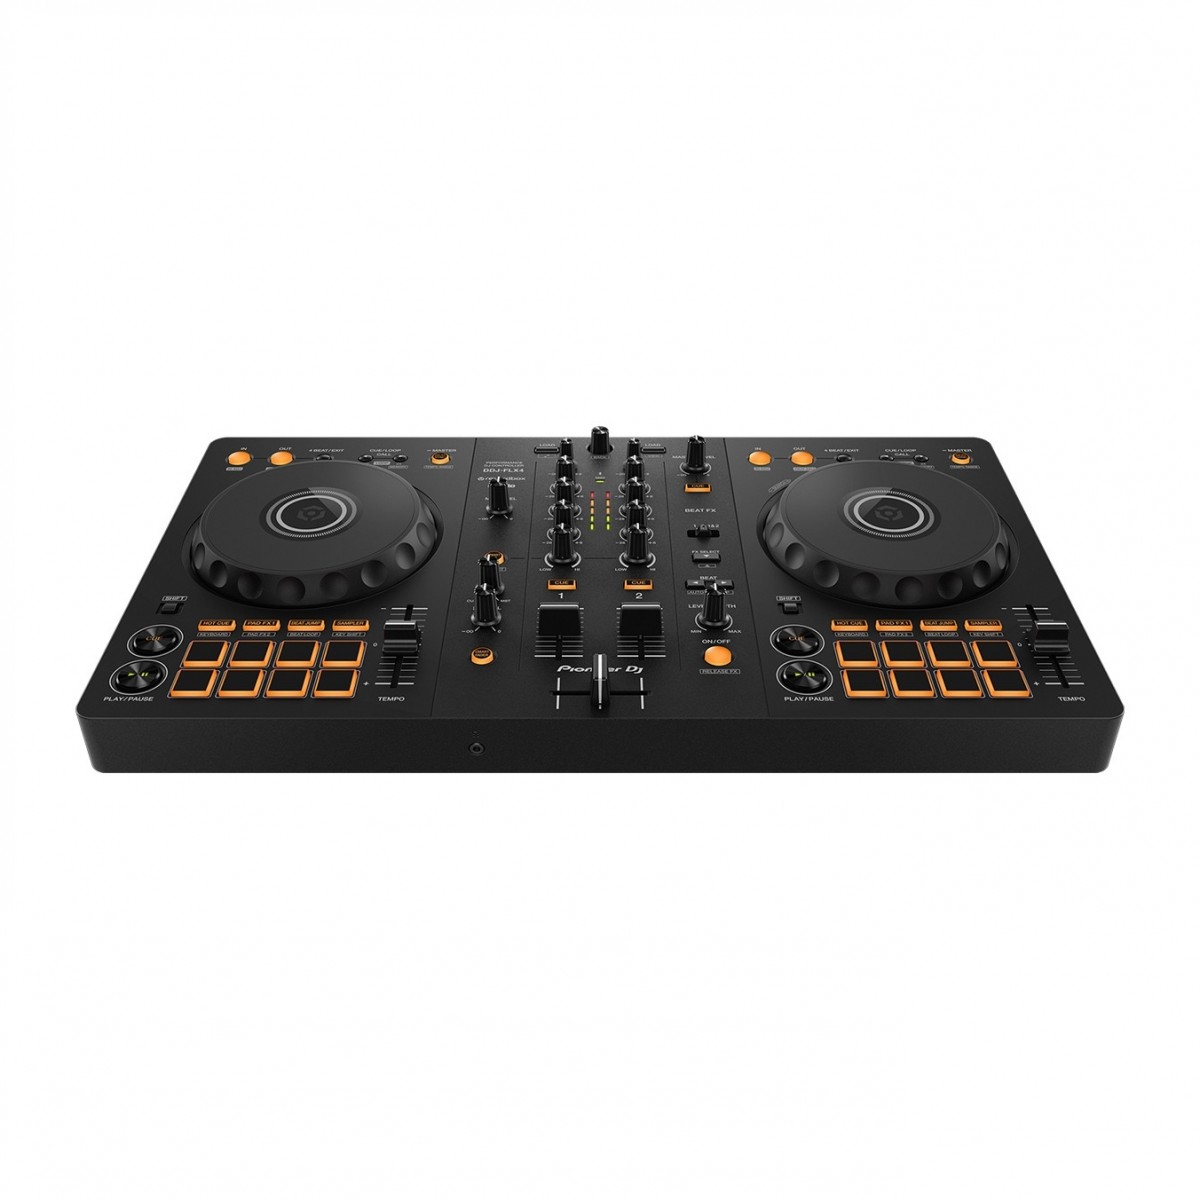
Connect your device
See the Connections section for the full breakdown. In short:
- Lightning iPad — USB-C to Lightning cable from FLX4’s USB-C data port to iPad. iPad charges via the same cable.
- USB-C iPhone — USB-C cable direct. iPhone charges via the same cable.
- Unused device can charge at the same time from the spare Anker plug ports — USB-C for the iPhone, USB-C to Lightning for the iPad.
Connect the audio signal chain
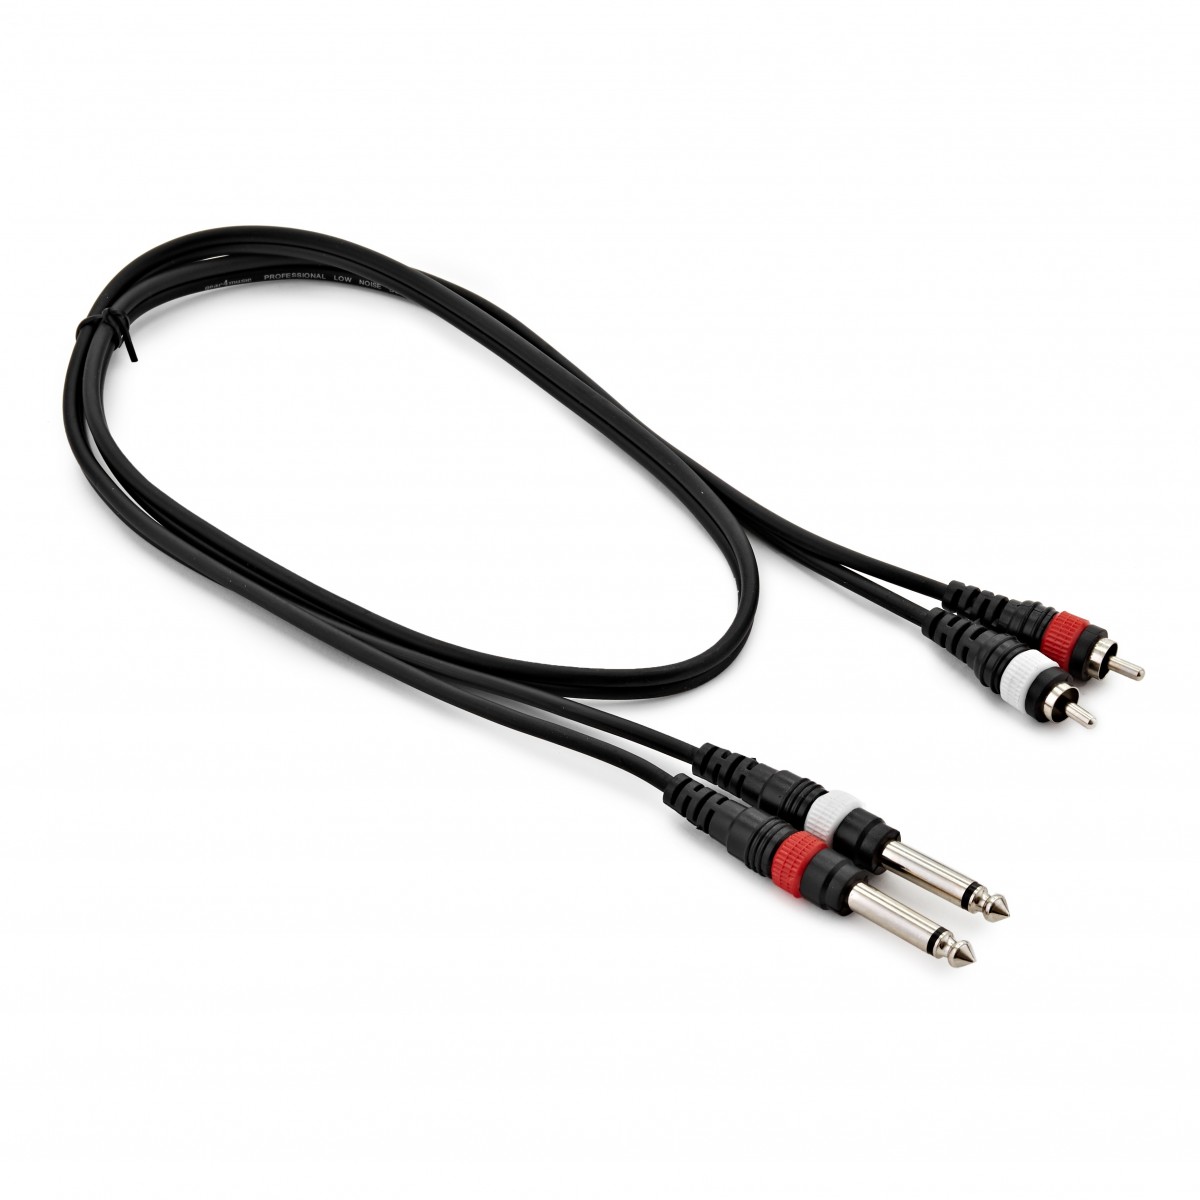
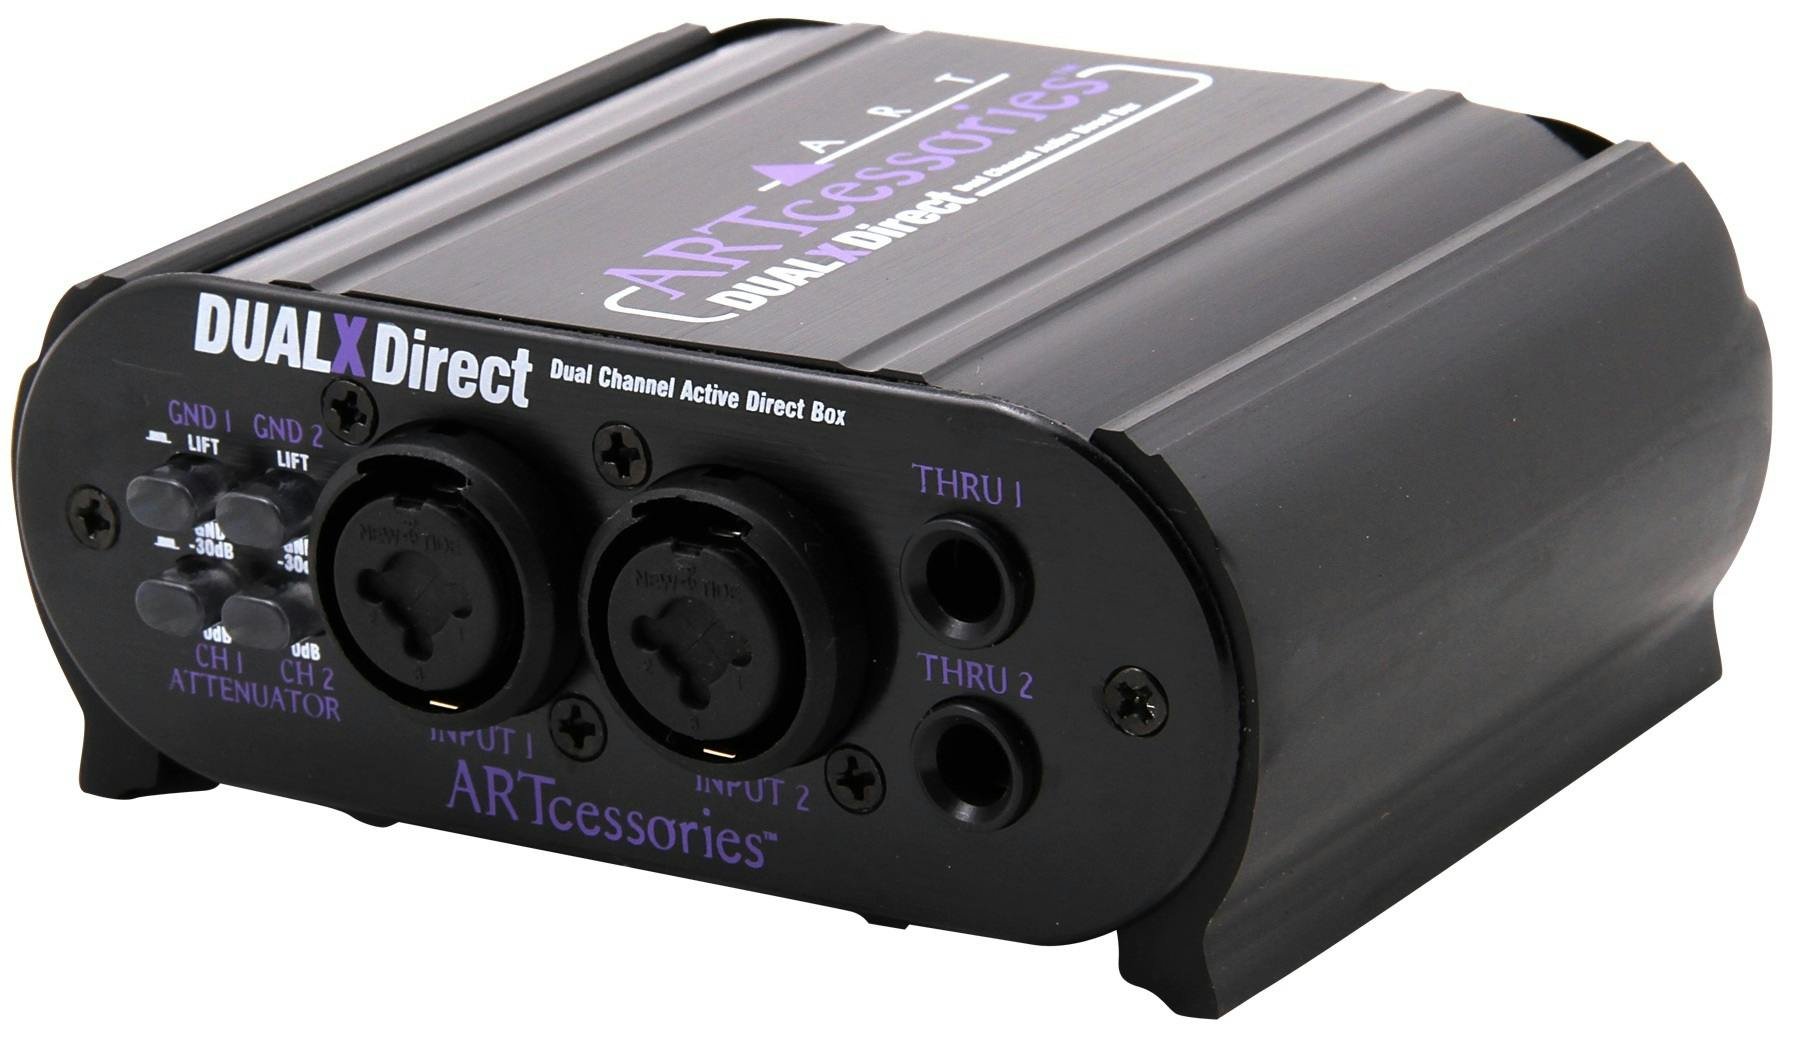
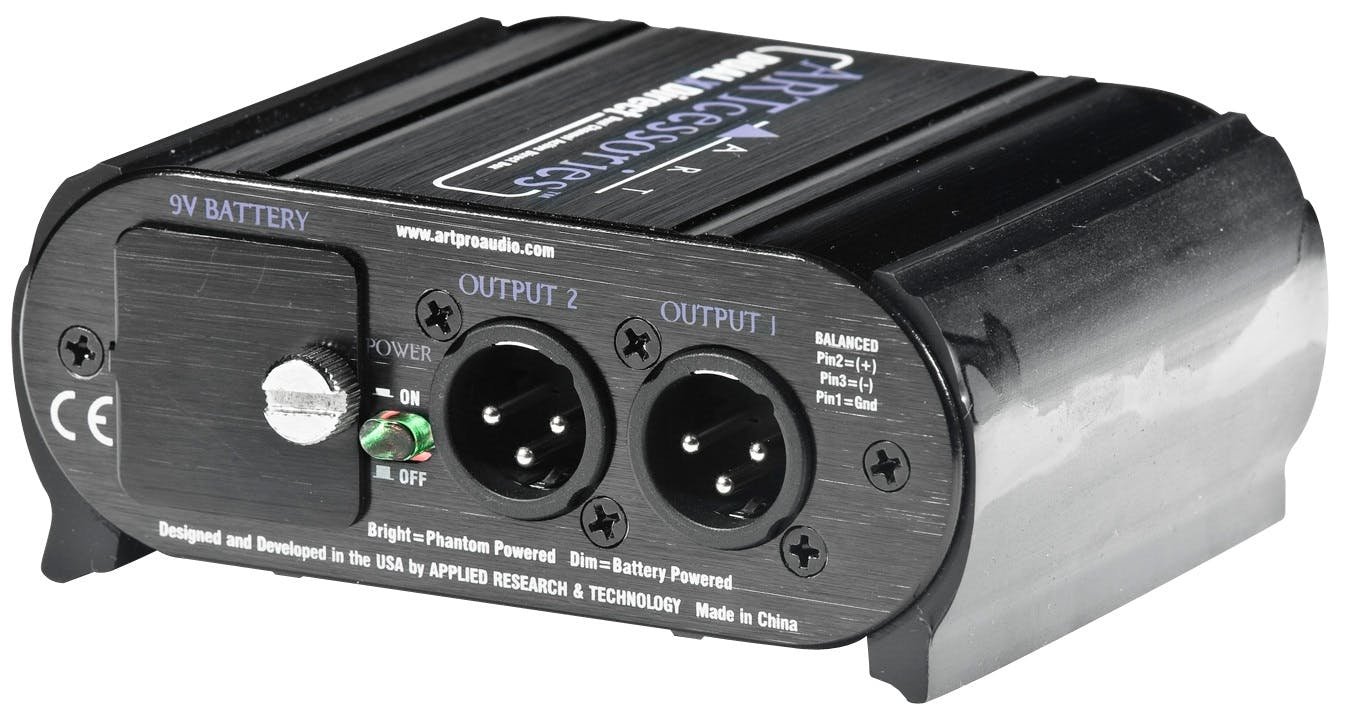
RCA outputs from the controller → RCA-to-jack cable → ART Dual X-Direct DI box → 15 m XLR extensions → XLR input on each speaker. Full walkthrough with images in the Signal Chain section.
Speakers, stands and cables
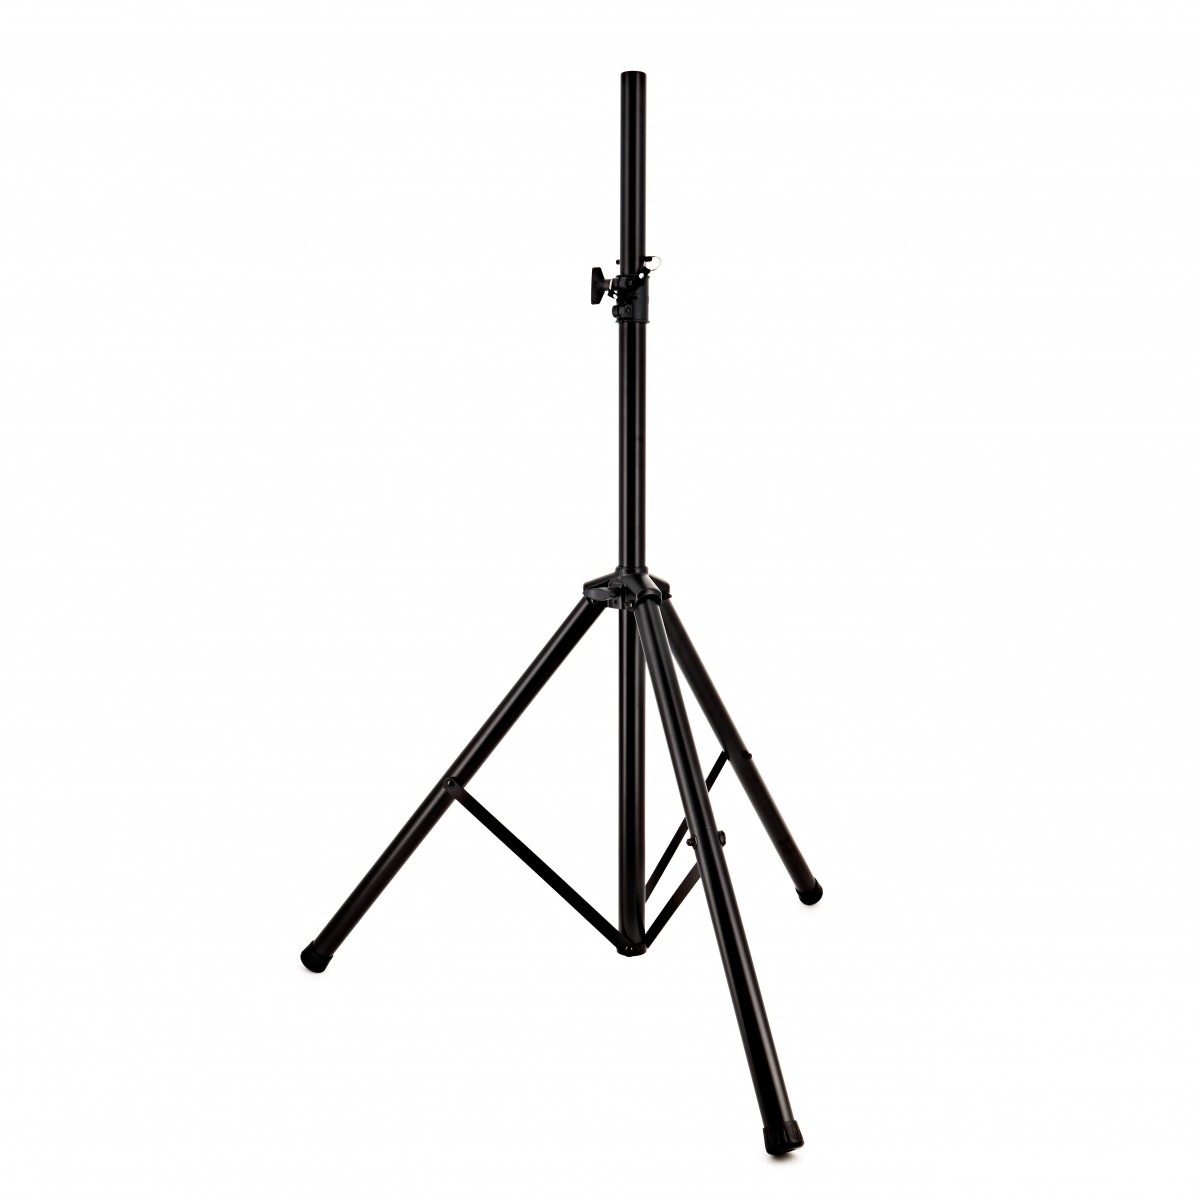
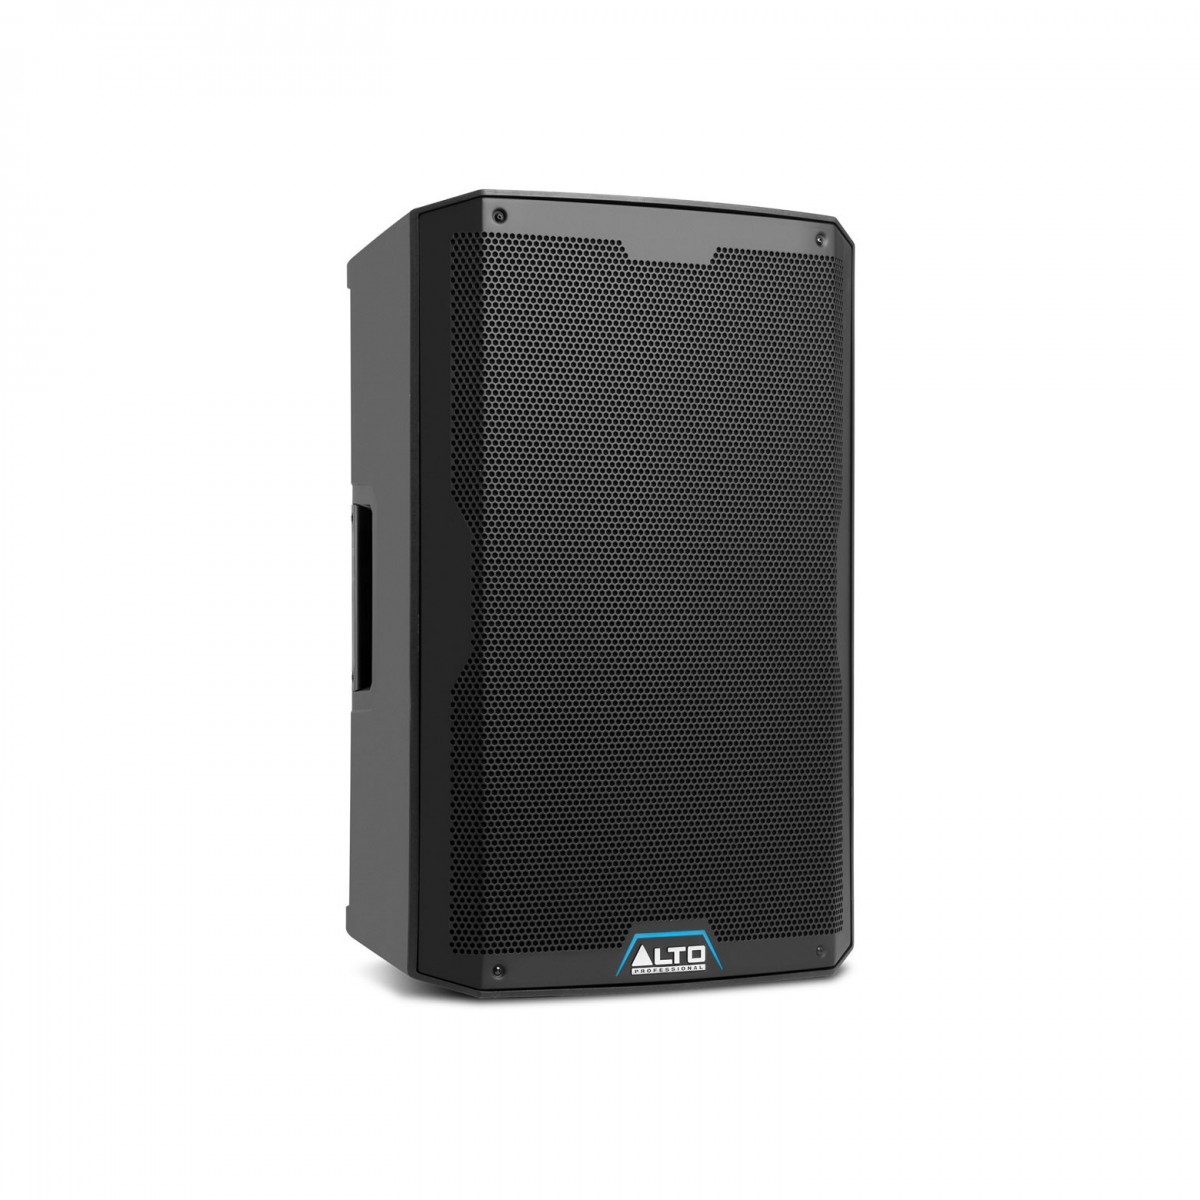
- Erect both stands and mount the TS415s at head height
- Barn: angle speakers inward toward the dance floor, not flat against the walls
- Run each 15 m XLR extension from the DI box output straight to each speaker
- Run the weatherproof extension reel from mains; plug surge strip at DJ position
- Power each speaker from the strip via its IEC inlet
Speaker input settings
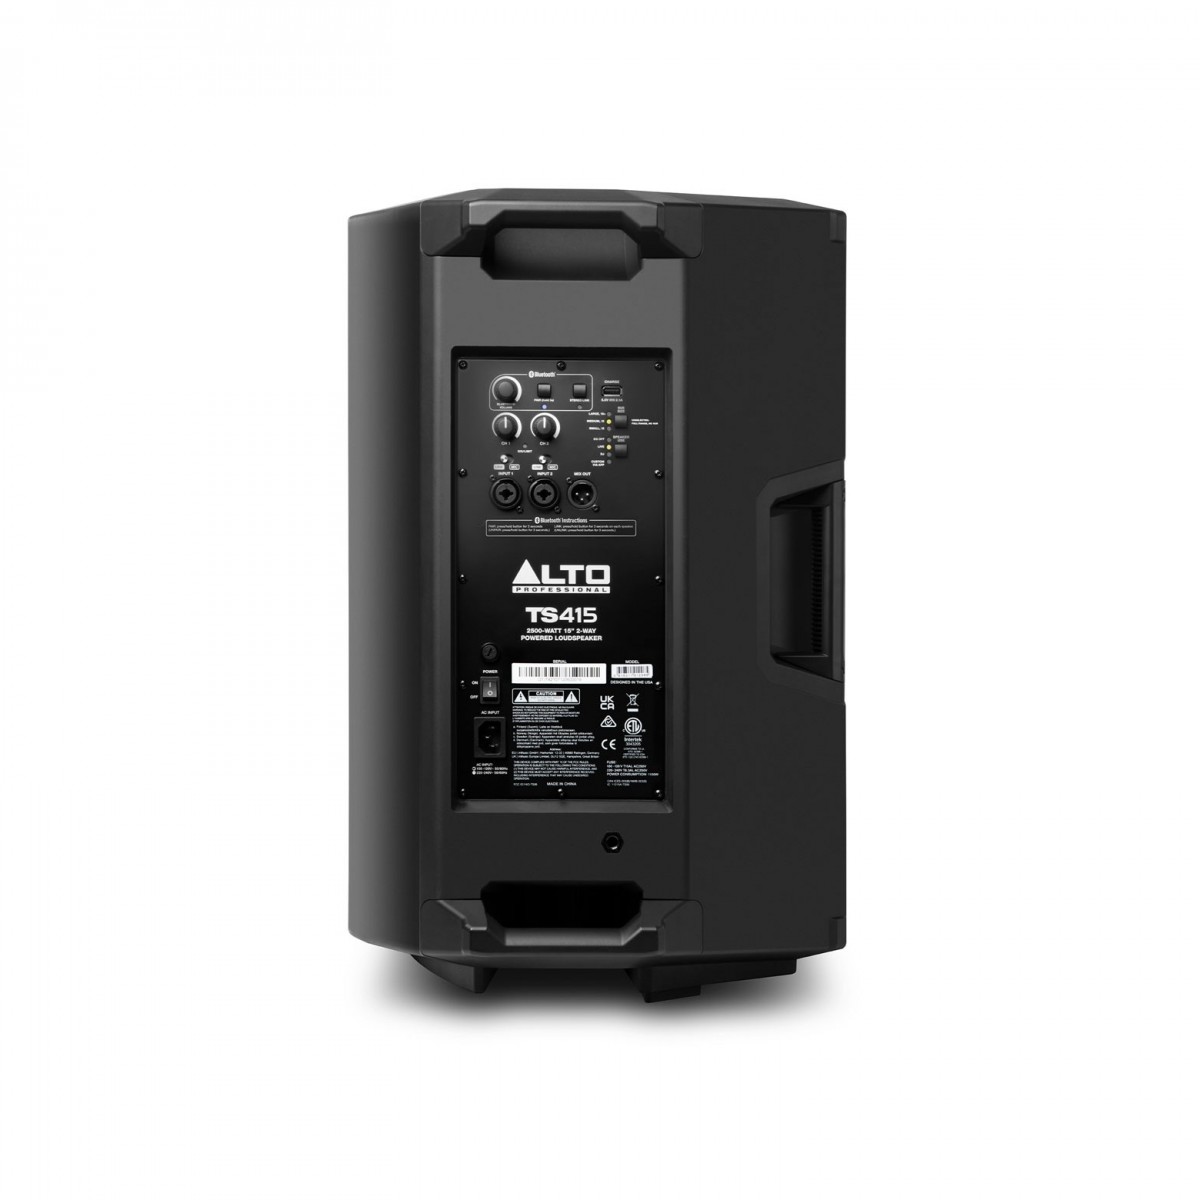
On the rear panel of each TS415:
- Plug XLR into INPUT 1 (CH1)
- Set the LINE/MIC switch on CH1 to LINE — not MIC
- Set SPEAKER USE to DJ
- Set CH1 gain knob to 12 o’clock to start
- Leave SUB SIZE unselected (full range, no sub) unless a sub is connected

Pair speakers as a Bluetooth stereo pair (Alto app)
The two TS415s can be linked wirelessly as a true stereo pair using the Alto Professional app. Do this before the event.
- On Speaker 1: hold the PAIR button for 3 seconds until the Bluetooth LED flashes — it becomes the primary
- On Speaker 2: hold PAIR for 3 seconds — it links to Speaker 1 as the secondary (STEREO LINK)
- Open the Alto app and connect to the speakers via Bluetooth
- Set SPEAKER USE to CUSTOM VIA APP on both speakers to enable app EQ control
- Use the app to set EQ, output level, and confirm the stereo assignment (L/R)
For wired-only use the Bluetooth pairing step can be skipped — SPEAKER USE: DJ works fine without the app.
Outdoor variant
- Sound dissipates fast — push gain a little harder than indoors
- Spread speakers wider for a better stereo image
- Cover all gear from dew and rain
- Keep iPad out of direct sun (overheating)
- Use the weatherproof reel for all mains runs over grass
Signal Chain
-XLR(15)15m.jpg)
Connection Paths
Left to right: power input • USB-C data port (5V/3A) • Android port • Master RCA outputs (R/L) • Mic input
Verify iPadOS 15 or later before the event: Settings → General → About
Confirm djay Pro recognises the controller on launch before starting.
Both paths share the same audio signal chain from the DDJ-FLX4 Master RCA outputs onward.
Important: How to Set the Volume aka gain staging
The DI box is active — it can boost as well as pass signal. Start with the CH1/CH2 attenuator switches on −20 dB to avoid clipping, and back off the pad further only if the signal is still too hot.
Set the DDJ-FLX4 Master level knob to around three-quarters, then fine-tune once sound is confirmed at the speakers.
Use the TS415 CH1 gain knob to set room volume. Start at 12 o’clock and increase to taste. The SIG/LIMIT LED on the speaker rear panel lights amber at high levels — back off if it stays on.
Use the channel gain knobs on the DDJ-FLX4 to fine-tune individual track loudness. Aim for peaks just below clipping on the Master meter.
DJ Software
- Officially supported hardware — Pioneer DJ and Algoriddim jointly confirmed the DDJ-FLX4 as supported. Full hardware mapping is built in. No manual MIDI setup required.
- Spotify integration is native — Spotify returned to djay Pro in September 2025 (desktop) and expanded to iOS/iPadOS in December 2025. Direct access to the full Spotify catalogue, personal playlists, and curated collections from inside the app.
- Automix — Spotify playlists work with djay’s AI-powered Automix for beat-matched automatic transitions. Useful during breaks away from the decks.
- Built for iPad — djay Pro for iOS is actively developed and more capable than rekordbox for iOS as a live performance tool.
Spotify limitations: Neural Mix stem separation requires TIDAL or local files (licensing). Offline mode requires active Wi-Fi or mobile data. Unofficial remixes, bootlegs, and DJ edits not on Spotify are unavailable via Spotify integration.
Minimum: iPadOS 15 or later — verify in Settings → General → About before the event.
Retained as a fallback. Spotify integration added to rekordbox in late 2025. Familiarity benefit — Dan (contact) uses rekordbox on his pub setup. Primary workflow for this kit is djay Pro.
Pre-Event Checklist
- Speaker stands assembled, locked, and positioned
- Speakers mounted at head height, angled inward toward the dance floor
- 15 m XLR extensions connected from DI box outputs to each speaker
- Both TS415 speakers powered on — SPEAKER USE set to DJ
- Speaker CH1 gain knobs at 12 o’clock (starting point)
- Extension reel and surge-protected strip plugged in at DJ position
- Anker charger powering FLX4 via USB-C (far left power port)
- Device connected to FLX4 USB-C data port — charging confirmed
- RCA → phono cable → DI box inputs connected — GND LIFT on, battery fresh (or spare packed)
- djay Pro launched — controller recognised (jogs and buttons respond)
- Test track playing — sound confirmed from both speakers
- Master level and speaker gain adjusted — no sustained clipping
- Cables routed safely — taped down across any walkways
- Spotify logged in and playlist loaded
- iPad on Do Not Disturb — notifications silenced
Troubleshooting
Trace the chain from source to speaker. Start at the beginning and work forward.
No sound from speakers +
- Check djay Pro is open and a track is playing — is the waveform moving?
- Check the Master fader is up and the Master level knob is turned up
- Check the Master meter on the controller is showing signal
- Check the RCA cables are firmly seated in the MASTER L/R outputs on the rear panel
- Check the Jack to RCA cable is connected at both ends — RCA ends in controller, jack ends in DI box INPUT 1 + INPUT 2
- Check the DI box is powered on — POWER LED lit dim (battery) or bright (phantom power)
- Check the DI box OUTPUT 1 + OUTPUT 2 are connected to the 15 m XLR extensions
- Check the XLR joints at both cable joins — pull and re-latch until the collar clicks
- Check XLR is in the INPUT 1 socket (CH1) on each speaker — not the jack socket
- Check both speakers are powered on with the power LED lit, and gain knob is not at minimum
Controller not recognised by djay Pro +
- Check the USB-C cable is firmly seated at both ends — FLX4 data port and device
- Check the Anker charger is powering the FLX4 via the far left power input port
- Quit and relaunch djay Pro — it often needs a restart after the controller is first connected
- Try unplugging and re-seating the USB-C cable at the FLX4 end
- If using Lightning iPad: confirm you’re using the USB-C to Lightning cable into the FLX4’s USB-C data port (not the power port)
Hum or buzz from speakers +
The DI box’s balanced XLR output and GND LIFT switches are there to prevent ground loop hum. If buzz persists:
- Flip the GND LIFT switch on the affected channel (CH1 and/or CH2) — try both positions
- Temporarily unplug the iPad charger — if hum disappears, the charger is the source. Try a different mains socket for the charger
- Check all XLR connectors are fully latched
- Ensure the USB cable and audio cables are not running parallel for long distances — cross them at 90° if needed
Low volume, or distorted/clipped sound +
The DI box is active, so level issues usually come from the CH1/CH2 attenuator switch being set wrong for the source.
- Too quiet: move the attenuator switch toward 0 dB (less pad)
- Distorted or crackling: move the attenuator switch to −20 dB or −40 dB (more pad)
- Increase the TS415 CH1 gain knob — try the 12 to 3 o’clock range
- Check the channel gain knobs on the controller are adequately set for the track
- Verify djay Pro’s output level is showing healthy signal
- Check the DI box battery isn’t flat — POWER LED should be lit
iPad losing charge during set +
- Check the Anker charger is powering the FLX4 via the power input port — the FLX4 charges the connected device, so it needs mains power itself
- Confirm you are using the USB-C to Lightning cable into the FLX4’s USB-C data port (not the power port)
- Close all background apps before the set starts
- Try the highest-wattage port on the Anker 65W charger
One speaker has no sound +
- Swap the XLR cables between speakers — if the problem moves with the cable, the cable is faulty
- Check both MASTER L and R RCA outputs on the controller are connected
- Check DI box OUTPUT 1 and OUTPUT 2 are both connected
- Check the affected speaker is powered on with the LED lit
Spotify tracks won’t load or buffer +
- Check the iPad has an active Wi-Fi connection
- If Wi-Fi is unreliable, pre-download playlists in Spotify before the event (Spotify Premium required)
- Confirm Spotify Premium is active on the logged-in account
- In djay Pro: Settings → Music Sources — confirm Spotify is connected and authorised